At 4:14pm on Friday, my realtor called to congratulate me: The closing was complete; I was officially Seattle's newest homeowner. Wahoo!
Not surprisingly, I ditched work immediately to go get the keys and savor my entree into the landed class. Not that there's all that much land involved here (just the fraction of an acre beneath my townhouse and a tiny patch in the back -- this isn't Tara), but the feeling that comes from knowing that the place is mine is pretty special. It's certainly the most expensive thing I've ever bought; also the most permanent. For the first time in my adult life, I have a place where I can stay forever and do what I want with it.
That last part -- the "do what I want with it" part -- is exciting. If the laws of physics and finances (a.k.a my savings account) didn't apply, I'd spend the next 72 hours redecorating the place top to bottom, moving in, and settling down. But the law of physics and finances do apply, so I started with the lightbulbs.
That's right: lightbulbs. Because as much as I loved this house, I hated every single one of its lightbulbs with a red-hot passion. There's nothing worse (except maybe Doritos) than bad lighting, and these lightbulbs were dishing it out in spades. Flip a switch and the rooms were bathed in dim, yellowy light more reminiscent of a prison cell than your grandmother's kitchen. Welcome to the world of energy efficient, compact fluorescent lightbulbs.
The first step in solving the lightbulb problem was to get a sample of all the lightbulbs in the house. I took my stepladder and gathered them all up -- from the ceiling cans to the vanities to the little spotlights over the kitchen -- and took them to an expert.
My expert of choice was Rejuvenation, a high quality lighting shop that sells beautiful, classic light fixtures. I figured that if anyone could help me, they could. I walked in with my bagful of lightbulbs, spread them on the counter in front of the first salesperson I could find and, "Okay, I need you to solve all my problems. Go!"
Funny thing is, he didn't. He was super friendly and gave me some good information about lightbulbs generally, and the transition from traditional incandescent lightbulbs to more efficient products specifically, but he didn't carry most of the types of bulbs I needed. So I left and went to Home Depot.
Home Depot is where most of you probably thought I should have started, and it turns out you were right. It's huge and overwhelming, but they've got everything you need in terms of housing basics, and their staff is super helpful. I stood in lightbulb aisle for all of thirty seconds before a guy came up and asked if I needed help finding the right bulb to match. I said, "No, I hate all of these bulbs, so definitely no matching. What I need are bulbs that will fit in the same fixtures but look pretty and not suck my will to live."
Rather than waste a day doing non house-related things (like grocery shopping or exercising), I left my paint chips and went outside. The back yard is small and already well planted. But the plantings were a little overgrown for my taste, and there were a bunch of weeds and random tree saplings coming up where they shouldn't. I took my shears and trowel (and in the case of the saplings, which turned out to be runners from a hidden tree stump, a hacksaw) to the intruders and eventually had the place looking more under control. (I'm enough of a newby to this house-fixing business that I only took befores -- I'll have to post some afters later. Sorry!)
Weeding and pruning are rewarding enough (four garbage bags full!), but the real cherry on top was discovering that my fountain works!! There's a rock in my garden with a hole through which water is supposed to bubble to create a serene water element to the overall design. Throughout the entire buying process, the fountain hadn't been working and the builder said I'd probably need to replace the pump. Only this afternoon, when I started digging around to find the pump, I discovered not only the pump, but also the power cord running from the ground, under the bushes, to an outlet in the back wall. Lo and behold, the dang thing wasn't plugged in! I plugged it in and within seconds the fountain sputtered to life. Perfect working condition!
Having a pretty fountain and the sound of running water just outside my kitchen window makes me as happy as can be. Delighted, I made my way to the roof to enjoy the evening light and views of the lake, city and mountain. Love it!


Not surprisingly, I ditched work immediately to go get the keys and savor my entree into the landed class. Not that there's all that much land involved here (just the fraction of an acre beneath my townhouse and a tiny patch in the back -- this isn't Tara), but the feeling that comes from knowing that the place is mine is pretty special. It's certainly the most expensive thing I've ever bought; also the most permanent. For the first time in my adult life, I have a place where I can stay forever and do what I want with it.
That last part -- the "do what I want with it" part -- is exciting. If the laws of physics and finances (a.k.a my savings account) didn't apply, I'd spend the next 72 hours redecorating the place top to bottom, moving in, and settling down. But the law of physics and finances do apply, so I started with the lightbulbs.
That's right: lightbulbs. Because as much as I loved this house, I hated every single one of its lightbulbs with a red-hot passion. There's nothing worse (except maybe Doritos) than bad lighting, and these lightbulbs were dishing it out in spades. Flip a switch and the rooms were bathed in dim, yellowy light more reminiscent of a prison cell than your grandmother's kitchen. Welcome to the world of energy efficient, compact fluorescent lightbulbs.
The first step in solving the lightbulb problem was to get a sample of all the lightbulbs in the house. I took my stepladder and gathered them all up -- from the ceiling cans to the vanities to the little spotlights over the kitchen -- and took them to an expert.
My expert of choice was Rejuvenation, a high quality lighting shop that sells beautiful, classic light fixtures. I figured that if anyone could help me, they could. I walked in with my bagful of lightbulbs, spread them on the counter in front of the first salesperson I could find and, "Okay, I need you to solve all my problems. Go!"
Funny thing is, he didn't. He was super friendly and gave me some good information about lightbulbs generally, and the transition from traditional incandescent lightbulbs to more efficient products specifically, but he didn't carry most of the types of bulbs I needed. So I left and went to Home Depot.
Home Depot is where most of you probably thought I should have started, and it turns out you were right. It's huge and overwhelming, but they've got everything you need in terms of housing basics, and their staff is super helpful. I stood in lightbulb aisle for all of thirty seconds before a guy came up and asked if I needed help finding the right bulb to match. I said, "No, I hate all of these bulbs, so definitely no matching. What I need are bulbs that will fit in the same fixtures but look pretty and not suck my will to live."
After another thirty seconds, the man had shown me a bunch of different options. Between what he taught me, the stuff I read on the boxes, and a few rounds of trial and error, here's what I learned:
LED bulbs are the way to go. They're energy efficient, but they don't have the flaws that make the fluorescent bulbs so awful: The light is brighter, cleaner and more pleasant. They don't have to warm up to full brightness. They look normal; not those weird curlicue shapes.
The diameter of a lightbulb is expressed as a number that you would never know was the size unless someone pointed it out to you. For example, I needed a 20. This saved me a lot of hassle opening up boxes and measuring across the tops to see if they'd fit.
The color of the light is super important, and there's a better way of gauging it than just focusing on the "bright white" or "soft white" or "daylight" labels on the box. Each lightbulb will have a warmth value expressed as a number that ends with a "k" (e.g., 2700k), and most of the time there will be a little graph plotting that number on a timeline from warm to cool. I wasn't sure which color value I wanted, so I bought four different bulbs with four different values and tried them all out at home. Turns out 3000k was too cool for my taste, and 2700 was too warm -- but like Baby Bear's porridge, the bulbs in the 2800-2900k range were just right. So I went back to Home Depot and bought all my bulbs in that range.
 |
| The winner! I ended up buying 15 of these puppies. |
Wattage is just as important as color. You can get the right color, but if the wattage is too low for what you need, it still won't be right. I like bright light, so I looked for ways to get the most bang for my buck. The key is to know that the big wattage number on the package of energy efficient bulbs is the replacement wattage, not the actual wattage (which is much lower and written in much smaller print). So if you're replacing a 40 watt incandescent lightbulb, you can look for a 40 watt replacement energy efficient bulb and have the same brightness. Or, if 40 watts is too dim for you, you can get an energy efficient bulb with as much as 75 watts -- since the actual wattage use is much lower, you won't fry your fixture.
Light bulbs are expensive! My purchases were spread out over several trips to Home Depot (including a few returns and exchanges), but to change out all 25+ lightbulbs in my house, I'm pretty sure I spent over 200 dollars (that's what happens when you need fifteen of the $8.00 bulbs). Seems like a lot, but I think it's worth it: The look of the place is transformed (I can see real colors!) and the efficiency gains promise to save money over time and last for many years longer than the traditional incandescent bulbs. So ask me in seven years if the savings has paid out...After the success of my lightbulb project, I wanted to move right on to paint selection. I'll tell you more about that later, but the basic gist is that I spent a lot of time looking at paint chips and spreading sample pints on the walls, all to discover that nothing I'd picked out was quite right. So dead-end on that front until next week when I can get back to the paint store for more samples.
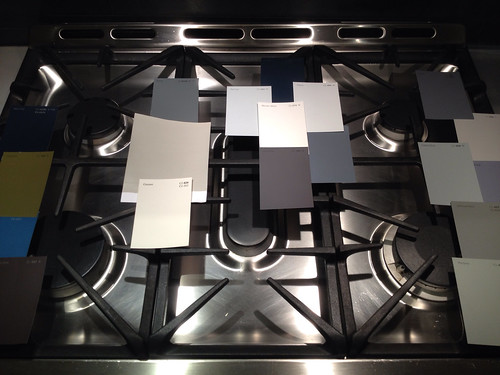 |
| The paint chips looked so good lying there on the stove. Why couldn't they have worked on the wall? |
Rather than waste a day doing non house-related things (like grocery shopping or exercising), I left my paint chips and went outside. The back yard is small and already well planted. But the plantings were a little overgrown for my taste, and there were a bunch of weeds and random tree saplings coming up where they shouldn't. I took my shears and trowel (and in the case of the saplings, which turned out to be runners from a hidden tree stump, a hacksaw) to the intruders and eventually had the place looking more under control. (I'm enough of a newby to this house-fixing business that I only took befores -- I'll have to post some afters later. Sorry!)
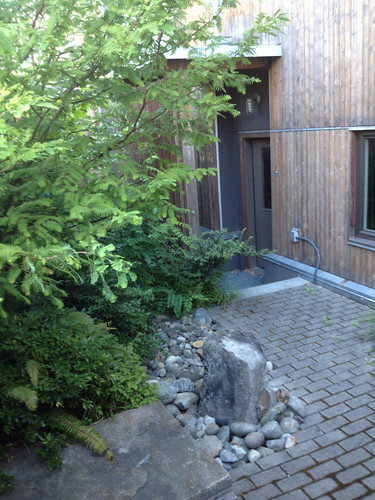 |
| Even as a "before" shot, this photo isn't great. The worst offenders of the weeds/saplings were all off to the left, behind the branches in the foreground. But you do get a good shot of the dry fountain. |
 |
| Can you see it? The dark part is where the water runs. |
2 comments:
Congrats on the fountain working! Nothing better than a water feature!! Rule of thumb on pruning over grown plant life; cut out only 1/3 of the shrubbery/tree at a time, unless it really doesn't matter to you if it doesn't come back. If that's the case, cut that puppy right down to size. You have a 50/50 chance of it either coming back or dieing. Heavy tree pruning on trees you want to come back is best late winter while the tree is still dormant. Good luck! Fall planting of Pansies gives you hearty pops of color, AND they come back to life in the spring. Can't wait to visit!
Ok, I was worried about you and the CFLs, nothing is more soul sucking than those. And also, they are bio hazards if they break. No bueno.
LEDs are good, and I'm glad you discovered them. I've hoarded old regular bulbs for the next forever. So when those run out, I'm sure we'll be using something else.
As for paint chips. Tape them on the wall in the sunniest spot in the house and leave them there for about a week to see how the color does in the light.
Happy homeing!
Post a Comment